Fast Multi-Cam Editing in Premiere Pro CC 2020
adobe
faster editing workflow
multi camera editing
premiere pro
Tips & Advice
Tutorials
Videography
GearFocus
Jun 18, 2020
These days more than ever speed and efficiency are important. This is especially true for video editors. When you have all the tools at your fingertips, it's just a matter of finding the shortcuts to get the job done fast. That's why fast multi-camera editing workflow in Premiere Pro can be so important in helping you get your edits done faster!
https://youtu.be/f9dY4wO-4Q8

 Now that all the camera angles are on our timeline we will synchronize them. This is where the built-in sync from Premiere Pro comes in to play. Or if you'd rather, you can use your third party software to sync the clips up. The Premiere Pro sync can be a little finicky when syncing multiple angles so if you already have something like PluralEyes you may want to jump straight into that.
 Once everything is synced up properly, it's time to make a nested sequence. For even faster multi-cam editing, you can hotkey the nest button to your keypad. If you edit a lot of multi-cam sequences, it may be well worth the time to hotkey the nest button. Once nested, you've got your multi-cam sequence!
 The last thing you need to do before editing is to enable the multi-cam. Select the option via the dropdown and you are now ready to edit your sequence. Be sure that your program window is set to multi-cam. (Generally it will be defaulted to "Composite.")
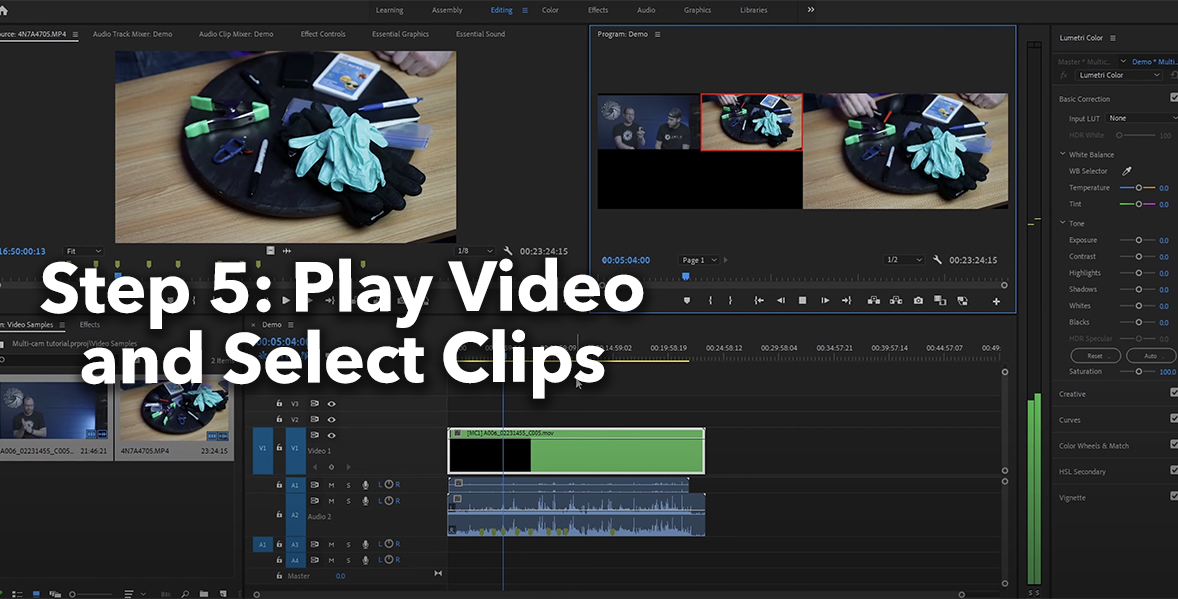 Now you are ready to edit! Simply play the video from the start and as the playhead moves you simply select the number atop your keyboard corresponding to the camera angle you wish to take. This way you can watch and edit in real time!
What is Multi-Cam Editing?
Multi-cam editing is a built-in feature right inside Adobe Premiere Pro. There are many great pieces of software out there such as Plural Eyes by Red Giant that perform audio/video sync. However, this is a feature that exists right in Premiere Pro so there may not be a need to spend any more money. Essentially, these different pieces of software analyze the audio clips and sync based on waveforms. Once everything is synced, you can create a multi-cam editing sequence to be able to swap camera angles back and forth on the fly. This operates similar to live video feed switchers so you can "direct" the camera angles you want when you want them.Fast Multi-Cam Editing
This tutorial was setup using Premiere Pro CC 2020, but it should work similarly on other versions of Premiere. If using different video production and editing equipment, look for the "multi-cam" settings and they will likely be very similar to Premiere's. These are very easy to follow steps. Once you have the multi-cam set up you'll wonder how you edited without it!Step 1: Align Your Clips on Separate Tracks
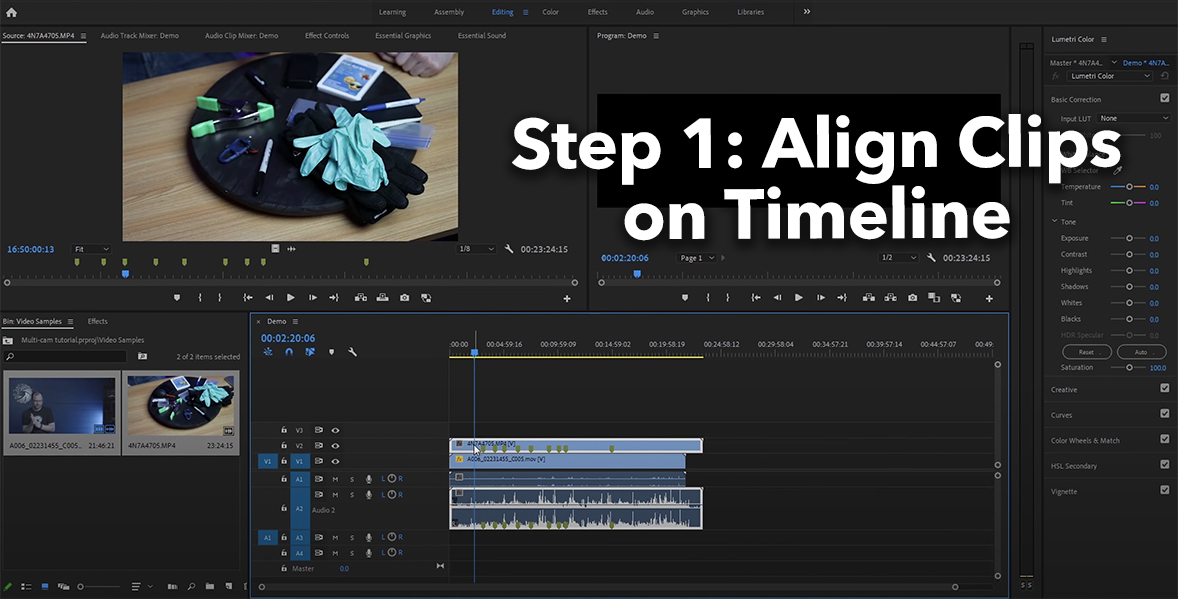
The first step is to put all your separate camera angles onto different tracks of your timeline. Each camera angle should be a track on the timeline. Don't worry if they aren't aligned perfectly; we're going to synchronize them in the next step.
Step 2: Synchronize Your Clips
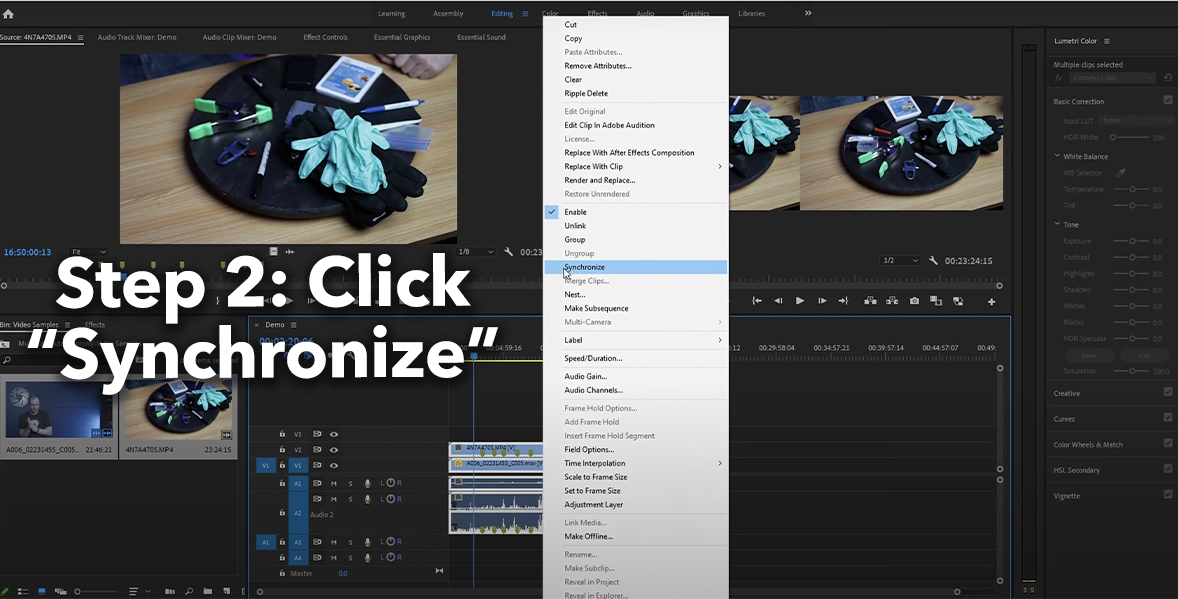
 Now that all the camera angles are on our timeline we will synchronize them. This is where the built-in sync from Premiere Pro comes in to play. Or if you'd rather, you can use your third party software to sync the clips up. The Premiere Pro sync can be a little finicky when syncing multiple angles so if you already have something like PluralEyes you may want to jump straight into that.
Step 3: Nest the Sequence
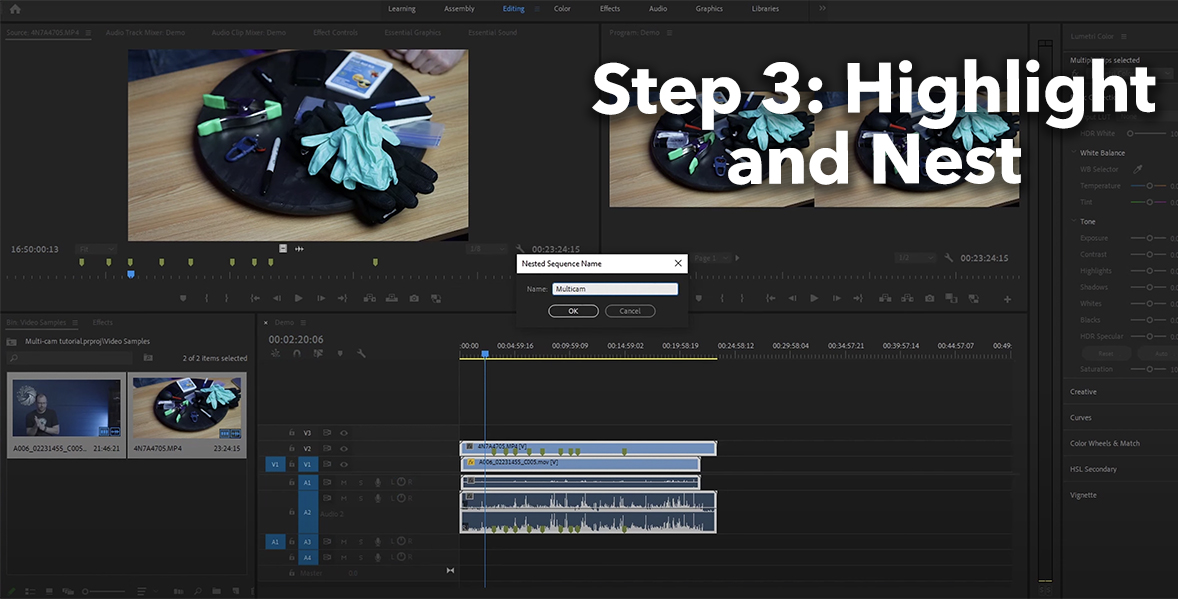
 Once everything is synced up properly, it's time to make a nested sequence. For even faster multi-cam editing, you can hotkey the nest button to your keypad. If you edit a lot of multi-cam sequences, it may be well worth the time to hotkey the nest button. Once nested, you've got your multi-cam sequence!
Step 4: Enable Multi-Cam Editing
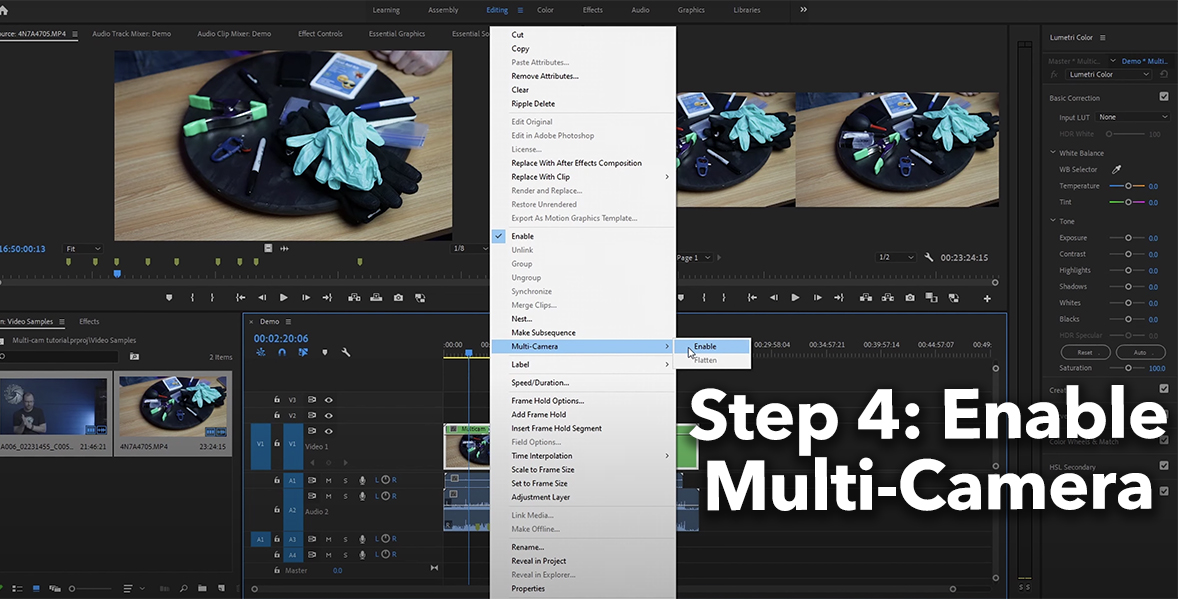
 The last thing you need to do before editing is to enable the multi-cam. Select the option via the dropdown and you are now ready to edit your sequence. Be sure that your program window is set to multi-cam. (Generally it will be defaulted to "Composite.")
Step 5: Playback and Edit
 Now you are ready to edit! Simply play the video from the start and as the playhead moves you simply select the number atop your keyboard corresponding to the camera angle you wish to take. This way you can watch and edit in real time!
More Editing Tips & Tricks
We at Gear Focus are happy to bring you these tips and tricks to help speed up your workflow! If you liked this fast multi-cam editing tutorial, let us know which topic you think we should tackle next. What are your tricks for faster editing? We'd love to hear your thoughts in the comments below. And your ideas may be featured on our next blog (which by the way was just selected as a top 20 Camera Gear Blog by Feedspot!)Own one like this?
Make room for new gear in minutes.
Loading...